How to Clone an SSD to a Bigger One (2025): Step-by-Step for Windows & Mac
Upgrading your storage is one of the easiest ways to make an older laptop or desktop feel new again. Cloning moves your existing Windows or macOS installation; apps, files, settings onto a larger SSD so you don’t have to start from scratch. Below is a clean, reliable process that works whether you have a spare M.2 slot or only one drive bay.

What you’ll need (quick checklist)
- A larger SSD (same interface as your current drive: NVMe M.2, SATA 2.5”, etc.).
- A USB-to-NVMe enclosure or SATA–to–USB cable if your device has only one internal slot.
- A Phillips screwdriver (for desktops and many laptops).
- Power adapter for laptops (do the clone on mains power).
- A recent backup of your important files (belt-and-braces).
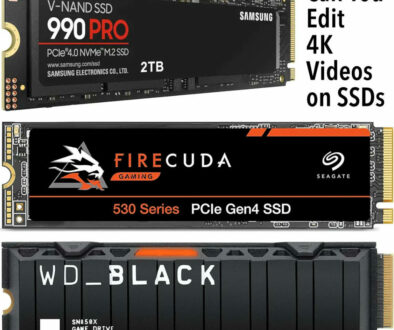
When buying SATA enclosure, be sure to match the size and key (images below) to ensure that your SSD is compatible.


Pick your path: direct clone vs. image & restore
A. Direct clone (fastest): connect the new SSD via USB/enclosure, run a cloning app, swap the drives, boot.
B. Image & restore (when you can’t connect both at once): create a disk image of your old drive to an external disk, swap the drives, then restore that image to the new SSD.
IMPORTANT: Both methods finish with a quick partition resize so Windows/macOS can use the extra space.
Before you start software and OS checklist (5 minutes of prep)
- Update your OS and restart once.
- Suspend BitLocker (Windows): Search Manage BitLocker → Suspend protection (you can re-enable after).
- Free up space: empty Recycle Bin/Trash and uninstall obvious bloat so used space < capacity of the new target if you’re moving to a slightly smaller “usable” size.
- Check partition style: modern systems use GPT/UEFI; keep it that way on the new drive.
WINDOWS OS
A. Windows: direct clone (most common)
We start with the steps for direct clone which is most common for Windows OS:
- Connect the new SSD: Plug the new drive into a USB enclosure/dock (NVMe or SATA to match your new SSD). Windows should see it in Disk Management. If it asks to initialize, choose GPT and don’t format partitions, the cloner will handle layout.
- Run your cloning tool: Any of these do the job well: the SSD vendor tool (Samsung Data Migration or Magician Software if you have Samsung SSD, Acronis (True Image) for WD/Crucial), or a trusted third-party disk imager/“clone” app.
- Choose Source = old system disk, Destination = new SSD.
- Enable intelligent/used-sector copy (skips free space).
- Tick SSD alignment or 4K alignment if offered (keeps performance optimal).
- If the app shows a layout view, drag the C: partition edge to fill remaining space on the new drive or you can expand it later in Disk Management.
- Start the clone: Close other apps, let it run. Typical time: 15–60 minutes depending on size and speed.
- Swap the drives & set boot order: Power down, remove the old SSD, install the new one internally. Boot to BIOS/UEFI and check the new drive is first in the boot list (or select it as the Windows Boot Manager entry).
- First boot & tidy-up
- •If Windows asks for BitLocker recovery, enter the key (stored in your Microsoft account or printed when you enabled BitLocker).
- •Open Disk Management and confirm your C: partition fills the drive. If not, right-click C: → Extend Volume…
- •Re-enable BitLocker if you suspended it.
Common laptop scenario: only one M.2 slot. Use the image & restore method below, or clone to the new drive using a USB enclosure, then physically swap.
B. Windows: image & restore (when you can’t plug both drives at once)
- Create a full disk image of your current drive to an external HDD/SSD using your cloning app (look for “Create image” or “Backup”).
- Create bootable rescue media inside the app (USB stick).
- Swap the SSDs (old out, new in).
- Boot from the rescue USB, pick Restore, point it at your image on the external drive, and restore to the new internal SSD.
- Reboot, extend C: if needed, and re-enable BitLocker.
MAC OS
macOS: the practical routes in 2025 (for non-upgradeable and upgradeable Macs)
Most modern Macs (Apple silicon and many Intel models) have storage that isn’t user-replaceable. Your best upgrade path is:
- Migrating to a new Mac: make a Time Machine backup to an external drive, set up the new Mac, then use Migration Assistant to pull apps, settings, and files.
- Staying on the same Mac but want “more space”: add a fast external SSD (USB-C/Thunderbolt) and move libraries (Photos, Final Cut, Steam) or large project folders there. Use Time Machine to back up both internal and external volumes.
Revive Your Old iMac 27 5K: How to boot from SSD instead of Fusion Drive without tearing into your iMac.
macOS: steps for upgradeable Mac
If you have an older, upgradeable Mac (e.g., certain 2012–2015 MacBook Pro, 2012–2019 iMacs with SATA bays, Mac Pro towers):
- Back up with Time Machine (always do this first).
- Install the new internal SSD, connect the old drive externally (USB enclosure) or keep it internally as a second disk (iMac/Mac Pro).
- Use Migration Assistant (Utilities) to move everything from old to new, or use a reputable cloning tool that supports APFS snapshots.
- Set Startup Disk to the new volume and reboot.
- Resize the APFS container in Disk Utility if you didn’t already claim the extra space during restore.

How to expand partitions after cloning (Windows)
Right-click Start → Disk Management.
Right-click your C: partition → Extend Volume… → accept the default to eat the remaining unallocated space.
If a recovery partition sits at the end blocking the extend, many tools let you re-arrange partitions during the clone. If not, you can temporarily move that small partition with your cloning app and then extend C:.
Troubleshooting (quick fixes)
Won’t boot (“No bootable device” / loops to BIOS): enter BIOS and set Windows Boot Manager on the new SSD as first; on desktops, plug the new drive into the same M.2 slot/SATA port the old one used.
BitLocker recovery prompt every boot: re-enable BitLocker properly or Suspend it, reboot once, then Resume to refresh the protector.
Clone to smaller SSD fails: you can only clone to a smaller target if used space is below the new capacity and you shrink the C: partition first (Disk Management → shrink).
NVMe driver/IRST issues (older Intel laptops): in BIOS, set storage mode to AHCI instead of RAID/IRST before cloning; or keep the same mode across the clone.
Capacity looks wrong: check decimal vs binary math (1 TB ≈ 931 GiB in Windows). If a big chunk is “Unallocated,” extend C:.
Stutters after the move: install the latest chipset/NVMe drivers and SSD firmware from your laptop/SSD vendor.
Good habits after you upgrade
- Keep the old SSD intact for a week as a fallback.
- Turn on TRIM (Windows does this by default; macOS too).
- Run the SSD’s health tool (from Samsung, WD, Crucial, etc.) once in a while.
- Keep regular backups (Time Machine on Mac, File History / image backups + cloud for Windows).
Related: