New MacBook Setup: First 10 Things To Do: Privacy, Time Machine, Battery & iCloud
New MacBook day! Got a MacBook from Prime Day, Back to School Offer, Black Friday, Cyber Monday or as a Christmas Gift? Here is a quick 20–30 minutes to lock it down, back it up, and squeeze the best battery life out of it. Work through these ten steps in order for a clean, simple, and secure start for your new MacBook.

10 Things to Do to Setup Your New MacBook
Point by point how-to tutorial to a great start for your MacBook. Here is a quick overview followed by the actual quick steps. We promise you that following this steps in this tutorial will only take between 20 to 30 minutes but will truly pay off and give you peace of mind.
- Update macOS and your apps for security and efficiency
- Sign in to your Apple ID and iCloud Drive for syncing and cloud storage
- Encrypt the disk with FileVault (and save the recovery key) for security
- Touch ID, strong password and Find My Mac for more security
- Set up Time Machine (and test a restore) for backup
- Quick Privacy Sweep (3 minutes)
- Battery and Power Settings that actually help
- Keyboard, trackpad gestures and Hot Corners
Remember that some of these steps may take a while so break up your setup or leave restarts or reboots to the end if possible.
1. Update macOS and your apps (this may take awhile so let it run in the background)
Open System Settings → General → Software Update and install anything pending.
In the same pane, turn on Automatic updates. Then open the App Store → Updates and clear the queue. Fewer bugs, better battery.
2. Sign in to your Apple ID + iCloud Drive
System Settings → [username]. Sign in, then enable the following:
- iCloud Drive (switch on Desktop & Documents so files follow you)
- Photos (optional: Optimise Mac Storage if your SSD is small)
- Messages in iCloud (keeps conversations in sync)
Signing up to iCloud also helps with things like location services (Find My, more on this later) to keep track of your devices, Copy and Paste between devices, simple things like Notes, Bookmarks and Calendar syncing. Also, signing in with your Apple ID helps with continuity when moving from one Apple device to the next.
3. Encrypt the disk with FileVault (and save the recovery key)
System Settings → Privacy & Security → FileVault → Turn On.
Choose where to store the Recovery Key (securely). If you ever forget your login password, this is your lifeline.
4. Touch ID, strong password and Find My Mac
Touch ID: System Settings → Touch ID & Password → add at least two fingers.
Find My: Apple ID → iCloud → Find My Mac → On. This also enables Activation Lock so a thief can’t reuse your Mac.
While you’re here, ensure Two-Factor Authentication is enabled on your Apple ID.
5. Set up Time Machine (and test a restore)
Plug in an external SSD (1–2 TB is ideal). Go to System Settings → General → Time Machine → Add Backup Disk.
Let the first backup finish. Then test: right-click a file in Finder → Browse Time Machine → restore a previous version. Now you know it works.

6. Quick privacy sweep (3 minutes)
For best security and privacy which is what Apple devices are known for, check the following settings:
System Settings → Privacy & Security:
- Location Services: only for maps/ride-hailing.
- Camera / Microphone / Screen Recording: approve just the apps you trust.
- Photos / Files & Folders: switch from “Full Access” to “Selected” where possible.
- Analytics & Improvements: opt out if you prefer less data sharing.
- Login Items & Allow in Background: trim anything you don’t need at startup.
7. Battery and power settings that actually help
System Settings → Battery:
- Keep Optimised Battery Charging on (slows wear by learning your routine).
- Use Low Power Mode during long lectures or travel days.
- Set sensible display sleep timers; lower keyboard backlight in dim rooms.
- If you dock often, unplug for an hour here and there to avoid sitting at 100% forever.
8. Keyboard, trackpad gestures and Hot Corners
A few minutes here boosts comfort all year.
- Trackpad: three-finger drag, tap-to-click, and swipe between full-screen apps.
- Keyboard: key repeat/accents to taste; remap Caps Lock to Escape if you code.
- Hot Corners: set one to Lock Screen, another to Quick Note for instant capture.
9. Focus modes and notifications (study-friendly)
System Settings → Focus: create a Study focus with allowed apps/people and a schedule.
Notifications: convert noisy apps to Deliver Quietly; enable Time-Sensitive only where it truly matters.
10. Defaults & safety nets
Depending on your preferences, here is where you set defaults and safety nets:
- Default browser & mail: set your favourites and import passwords/bookmarks.
- Passwords & passkeys: keep iCloud Keychain on; share credentials with family/housemates where needed.
- Night Shift / True Tone: kinder on your eyes; toggle per room if colour accuracy matters.
- Unlock with Apple Watch: if you wear one, it’s a lovely quality-of-life perk.

Nice extras (5–10 minutes)
Now that you have completed the setup of your new MacBook, here are a few more options to consider, to make it perfect!
Storage Management
Free up space in minutes. Open About This Mac → Storage → Manage (or System Settings → General → Storage) to see what’s eating your SSD. Use Recommendations to empty the bin automatically, remove old installers and large downloads, and review “Large Files.” If you use iCloud, turn on Optimise Mac Storage so rarely used files live in the cloud while keeping recent work local.
AirDrop & Continuity
Sign in with the same Apple ID on your iPhone/iPad and Mac, keep Wi-Fi and Bluetooth on, then enable System Settings → General → AirDrop & Handoff. You’ll get Universal Clipboard (copy on one device, paste on the other), Handoff (pick up Mail/Safari/Docs where you left off), AirDrop for instant file beaming, and Instant Hotspot to share your phone’s data without typing passwords.
Dictation & Voice Control
Hands full or want faster notes? Go to System Settings → Keyboard → Dictation and switch it on. Set the shortcut you prefer—press Fn twice by default (you can change it to Control twice). For full hands-free control, enable System Settings → Accessibility → Voice Control to open apps, dictate punctuation, and edit text using only your voice.
Gaming & creators
If you play games, make sure Game Mode kicks in (macOS enables it automatically when a game is in the foreground for lower latency). Pair your controller via Bluetooth, and use Full Screen for the smoothest feel. For creative work, install Apple’s Pro Video Formats if your apps need ProRes/RAW support, set the right Colour Profile under System Settings → Displays, and turn on hardware acceleration or background render in your editor (Final Cut, Premiere, Resolve) so exports fly.
Commonly Asked Questions
We leave with your some commonly asked questions to mop up any queries you may have when setting up your new system.
Do I need antivirus on a Mac? macOS has strong built-in protections (Gatekeeper, XProtect). Keep software updated and be careful with downloads. Some organisations require third-party tools—follow those policies if they apply.
Is iCloud enough for backups? iCloud syncs your files; Time Machine is the backup that lets you roll back versions or recover a wiped Mac. Use both.
How do I move from an old Mac/Windows PC? Use Migration Assistant (in Utilities). It can pull apps, files, and settings over Wi-Fi or a cable. Run updates again after migrating.
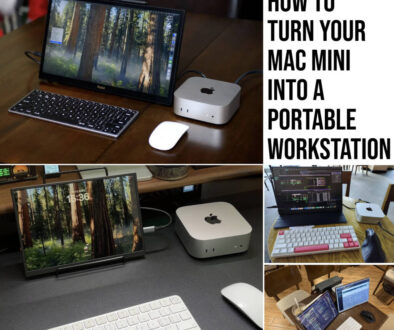
Two external monitors on a MacBook? Support depends on your exact model. Many MacBooks handle at least one external monitor; dual-display setups may require a Thunderbolt dock or DisplayLink adapter if your model only supports one natively.