Step-by-Step Guide on Installing ChromiumOS
As laptops age, they often become too slow to run modern operating systems like Windows or macOS efficiently. Instead of discarding an old device, ChromiumOS offers a lightweight, open-source alternative that can transform your outdated laptop into a fast, cloud-based workstation. Here are the steps to install ChromiumOS on your laptop.
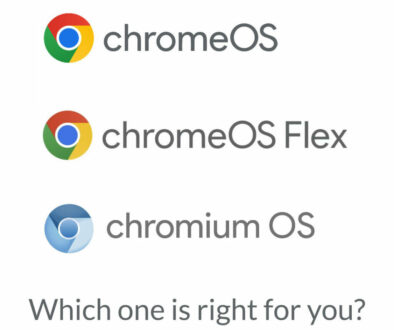
ChromiumOS is the open-source version of ChromeOS, developed by Google but maintained by independent developers. Unlike ChromeOS and ChromeOS Flex, ChromiumOS provides greater flexibility and customization options, making it ideal for developers, tech enthusiasts, and those who want a Google-free alternative to ChromeOS.
This guide will walk you through the step-by-step process of installing ChromiumOS, from choosing the right build and creating a bootable USB drive to installing and optimising the system for a smooth experience.

1. Understanding ChromiumOS: What You Need to Know
What Is ChromiumOS?
ChromiumOS is the open-source foundation of ChromeOS, designed to provide a lightweight, cloud-centric operating system that runs smoothly on older or low-spec devices. Unlike the official ChromeOS found on Chromebooks, ChromiumOS does not come with built-in Google services like:
- No Google Play Store (no Android apps).
- No automatic updates (must be updated manually).
- No official Google support or warranties.
However, it retains many of ChromeOS’s core features, including:
- Fast boot times and cloud-based functionality.
- Google Chrome browser for web-based tasks.
- Low system requirements, making it ideal for older laptops.
Who Should Use ChromiumOS?
ChromiumOS is best suited for users who want a lightweight OS for web browsing, email, and cloud applications. It is also great for developers or tech enthusiasts who prefer an open-source OS. If you are individuals looking for a Google-free ChromeOS alternative, Chromium is also your best bet. And, it is best for anyone who wants to repurpose an old laptop into a Chromebook-like device.
2. Choosing the Right ChromiumOS Build
Since ChromiumOS is not officially released as a downloadable OS by Google, you must use a third-party build to install it on your laptop. Different builds come with varying levels of features, compatibility, and update frequency.
Best ChromiumOS Builds to Consider
- ArnoldTheBats ChromiumOS – (No longer maintained at the time of writing) One of the most popular and actively updated versions, best for general users.
- FydeOS – A ChromiumOS build that supports Android apps and Linux, making it a great alternative to ChromeOS.
- CloudReady (Discontinued, now ChromeOS Flex) – Previously developed by Neverware, it was officially merged into ChromeOS Flex.
- FlintOS (ArchiveOS) – A lightweight ChromiumOS fork designed for low-power devices.
- ChromiumOS Vanilla (SourceForge) – The raw, unmodified version of ChromiumOS but requires advanced setup for full functionality.
Which Build Should You Choose?
| ChromiumOS Build | Best For | Supports Android Apps? | Ease of Installation |
|---|---|---|---|
| ArnoldTheBats ChromiumOS | General users | No | ⭐⭐⭐⭐ |
| FydeOS | Users who need Android apps | Yes | ⭐⭐⭐ |
| CloudReady (now ChromeOS Flex by Google) | Schools & businesses | No | ⭐⭐⭐⭐⭐ |
| FlintOS (ArchiveOS) | Lightweight systems | No | ⭐⭐⭐ |
| ChromiumOS Vanilla | Advanced users | No | ⭐⭐ |
For most users, ArnoldTheBats ChromiumOS is the best choice for a balance between stability and ease of use. If you want Android app support, FydeOS is the way to go. Once you’ve chosen the best build for your needs, it’s time to prepare for installation.
3. Preparing for Installation
Before installing ChromiumOS, you’ll need to gather the necessary tools and ensure that your device is ready for installation. Since ChromiumOS is not officially supported by Google, installation requires a third-party build and manual setup.
What You’ll Need:
- A working computer (Windows, macOS, or Linux) – Used to create a bootable USB drive.
- A USB flash drive (8GB or larger) – Required to install ChromiumOS.
- A compatible laptop or desktop – Intel or AMD-based (ARM support varies).
- Internet connection – Needed for downloading the OS and installing additional features.
Backup Your Data:
Since installing ChromiumOS may erase all data on your laptop, make sure to back up your important files using:
- External storage – Copy files to a USB drive or external hard drive.
- Cloud storage – Upload files to Google Drive, Dropbox, or OneDrive.
- Local partition – If dual-booting, save data to a separate partition.
Once you’ve backed up your data and have the necessary tools, you can download ChromiumOS and create a bootable USB drive.

4. Creating a Bootable ChromiumOS USB Drive
To install ChromiumOS on your old laptop, you first need to download a ChromiumOS build and create a bootable USB drive. This will allow you to either try ChromiumOS in live mode or install it permanently.
Step 1: Download the ChromiumOS Image
Since Google doesn’t provide an official download for ChromiumOS, you’ll need to use a third-party build.
- ArnoldTheBats ChromiumOS – (Best for general users).
- FydeOS – (Supports Android apps).
- FlintOS – (Lightweight version).
- ChromiumOS Vanilla – (Requires manual setup)
- Then there is Chrome OS Flex by Google.
Download the latest stable release for your chosen ChromiumOS build. The file format will be .img or .bin.
Step 2: Create a Bootable USB Drive
To install ChromiumOS, you need to burn the OS image to a USB flash drive (8GB or larger).
For Windows Users (Using Rufus):
- Download Rufus (rufus.ie) and insert your USB drive.
- Select the ChromiumOS .img file you downloaded.
- Set Partition scheme to MBR (for most devices).
- Click Start and wait for the process to complete.
For Mac Users (Using Balena Etcher):
- Download Balena Etcher (balena.io/etcher).
- Select the ChromiumOS image file and your USB drive.
- Click Flash to write the image to the USB.
For Linux Users (Using Terminal Command):
- Open the Terminal and use the dd command:
sudo dd if=/path/to/chromiumos.img of=/dev/sdX bs=4M status=progress
(Replace /path/to/chromiumos.img with the actual file path and /dev/sdX with your USB drive location).
Once the USB creation is complete, remove the USB drive safely. Your bootable ChromiumOS installer is now ready!

5. Installing ChromiumOS on Your Laptop
Now that you have a bootable USB drive, you’re ready to install ChromiumOS on your old laptop.
Step 1: Boot from the USB Drive
- Insert the USB drive into your old laptop.
- Restart the laptop and enter the BIOS/UEFI settings:
- Press F2, F12, ESC, or DEL during startup (varies by manufacturer).
- In the BIOS menu:
-
- Set USB drive as the first boot device.
- Disable Secure Boot (if applicable).
- Save changes and exit BIOS.
Your laptop will now boot into the ChromiumOS installer.
Step 2: Try ChromiumOS (Live Mode – Optional)
Before installing, you can test ChromiumOS without making permanent changes:
- Select “Try ChromiumOS” from the welcome screen.
- Check if Wi-Fi, keyboard, touchpad, and Bluetooth work properly.
- Browse the web and explore the system.
If everything works fine, you can proceed with the full installation.
Step 3: Install ChromiumOS Permanently
- Open Terminal (Ctrl + Alt + T).
- Type the command to launch the installer:
sudo /usr/sbin/chromeos-install --dst /dev/sda
- Confirm installation (this will erase all existing data on the device).
- Wait for the installation to complete (about 5–10 minutes).
- Once done, remove the USB drive and restart your laptop.
Your laptop will now boot directly into ChromiumOS, ready for first-time setup.

6. First-Time Setup & Configuration
Once ChromiumOS is installed, you’ll need to set up your user account, configure system settings, and install essential apps to optimize your experience.
Step 1: Sign in with a Google Account
- On the welcome screen, connect to Wi-Fi.
- Sign in with your Google account to sync bookmarks, Chrome extensions, and Drive files.
- If you don’t have a Google account, you can use ChromiumOS in Guest Mode, but your settings won’t be saved.
Step 2: Configure System Settings
After signing in, adjust your system settings for better usability and performance:
- Adjust display resolution – Go to Settings > Display if the screen looks blurry or stretched.
- Enable Tap-to-Click – If your touchpad doesn’t respond as expected, enable tap-to-click under Settings > Touchpad.
- Keyboard Layout & Shortcuts – Customize language preferences and shortcut keys under Settings > Keyboard.
- Enable Dark Mode – Go to Settings > Appearance to reduce eye strain.
- Set Power Management – Adjust sleep and battery-saving settings under Settings > Power.
Step 3: Install Essential Web Apps
Since ChromiumOS is web-based, you’ll need Progressive Web Apps (PWAs) for productivity, entertainment, and communication.
Recommended Web Apps for ChromiumOS
| Category | App Name | Website |
|---|---|---|
| Productivity | Google Docs, Sheets, and Slides | docs.google.com |
| Productivity | Gmail & Google Calendar | calendar.google.com |
| Productivity | Microsoft Office Online | office.com |
| Entertainment | YouTube | youtube.com |
| Entertainment | Spotify Web Player | open.spotify.com |
| Entertainment | Netflix & Prime Video | Via Browser |
| Communication & Social Media | Zoom, Microsoft Teams, WhatsApp Web | Various |
| Communication & Social Media | Slack & Discord | Various |
| File Management | Google Drive & Dropbox | Various |
| File Management | FileZilla | Advanced Users Only |
Step 4: Enable Linux (Optional, for Developers)
Some ChromiumOS builds support Linux integration, allowing users to install Linux apps and command-line tools.
- Open Settings > Advanced > Developers.
- Click Turn on Linux Development Environment.
- Follow the prompts to install Linux.
- Use the Terminal to install apps like VS Code, GIMP, or LibreOffice.
Step 5: Sync Browser Settings & Extensions
Since ChromiumOS is built around Google Chrome, you can:
- Sync your bookmarks, history, and saved passwords from other devices.
- Install useful Chrome extensions like ad blockers, password managers, and offline reading tools.
Your ChromiumOS laptop is now fully set up and ready for daily use!

7. ChromiumOS Limitations & Workarounds
While ChromiumOS is a great alternative to Windows or macOS, it has some limitations compared to official ChromeOS or ChromeOS Flex. Here are some common issues and potential solutions.
No Google Play Store (No Android App Support)
Since ChromiumOS is an open-source project, it doesn’t include Google’s proprietary services like the Play Store, meaning Android apps cannot be installed natively.
Workaround: Use web-based Progressive Web Apps (PWAs) as alternatives. Some ChromiumOS builds like FydeOS support Android apps, so if you need this feature, consider using FydeOS instead of standard ChromiumOS.
No Automatic Updates from Google
Unlike ChromeOS, ChromiumOS does not receive automatic security and feature updates from Google. Instead, users must manually update their system by reinstalling a newer build when available.
Workaround: Regularly check for new ChromiumOS builds from the community (e.g., ArnoldTheBat’s site) and reinstall as needed.
Some Hardware May Not Work (Wi-Fi, Bluetooth, Touchscreens, etc.)
ChromiumOS lacks official drivers for some hardware components, so features like Wi-Fi, Bluetooth, touchscreen, or fingerprint readers may not work on all devices.
Workaround:
Check Google’s compatibility list before installation.
Use an external USB Wi-Fi adapter if internal Wi-Fi doesn’t work.
Manually install missing drivers if available for your hardware.
No Built-in DRM Support (Netflix, Spotify, Prime Video May Not Work)
ChromiumOS lacks Widevine DRM support, which is required for playing protected content on streaming services like Netflix, Hulu, and Amazon Prime Video.
Workaround: Some ChromiumOS builds (like FydeOS) include Widevine support. If your build does not support it, you may need to manually install Widevine components, though success may vary.
No Virtualization Support (Cannot Run Windows Apps Natively)
Unlike some Linux distributions, ChromiumOS does not support native virtualization tools like VirtualBox or VMware, meaning you cannot run Windows or macOS apps directly.
Workaround: Use cloud-based remote desktop services, such as:
Chrome Remote Desktop (to access another PC or Mac remotely).
Citrix Workspace (for enterprise virtualization).
Shadow or Parsec (for cloud-based gaming).
Limited Offline Functionality
ChromiumOS is designed to work with an internet connection, meaning most features require online access.
Workaround:
Enable Offline Mode in Google Drive to edit documents without Wi-Fi.
Use Gmail Offline to read and compose emails without an internet connection.
Download media for offline viewing where supported.

Is ChromiumOS the Right Choice for You?
Installing ChromiumOS is an excellent way to breathe new life into an old laptop, giving it a fast, lightweight, and cloud-focused computing experience. It works best for web browsing, online productivity, and basic tasks, making it a great option for students, casual users, and developers who prefer an open-source alternative to ChromeOS.
However, ChromiumOS is not a perfect replacement for ChromeOS, as it lacks Google Play Store support, automatic updates, and official Google services. If you need Android apps or enterprise features, consider using ChromeOS Flex or FydeOS instead.
Ultimately, ChromiumOS is best for users who want a lightweight, DIY Chromebook alternative with full control over their OS. If you’re comfortable with manual updates and potential hardware limitations, it can be a great free solution for repurposing old devices while reducing e-waste.