Step-by-Step Guide on Installing ChromeOS Flex by Google
As laptops age, they often slow down, struggle with software updates or become too sluggish to run modern applications efficiently. Instead of discarding an old device, ChromeOS Flex offers a lightweight, cloud-based alternative that can breathe new life into aging hardware. Developed by Google, ChromeOS Flex is a free operating system designed to provide a fast, secure, and efficient computing experience, especially for web browsing, productivity tasks, and cloud-based applications.
Overview
Whether you’re a student, remote worker or casual user, ChromeOS Flex can transform an outdated Windows or macOS laptop into a fast Chromebook-like device. This step-by-step tutorial will walk you through the process of installing ChromeOS Flex, from checking compatibility and creating a bootable USB drive to installing and optimising the system.
Benefits of ChromeOS Flex:
- Faster performance on older hardware
- Simple, easy-to-use interface
- Built-in security and automatic updates
- Free to install and use
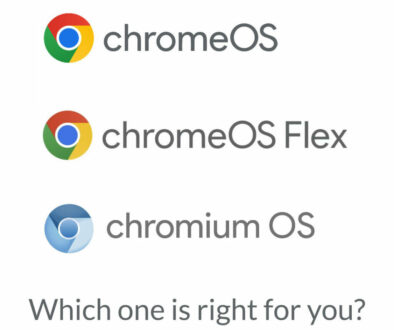
RELATED: Considering another alternative to ChromeOS, check out ChromiumOS in our installation guide.
1. System Requirements & Compatibility
Before installing ChromeOS Flex, it’s important to ensure that your device meets the minimum system requirementsand is compatible with the operating system.
Minimum System Requirements
To run ChromeOS Flex smoothly, your laptop or desktop should meet these specifications:
Processor: Intel or AMD x86-64-bit (no ARM support)
RAM: At least 4GB
Storage: At least 16GB of free space
Bootable USB Drive: 8GB or larger
Internet Connection: Required for installation and updates
ChromeOS Flex does not support ARM-based processors, meaning older ARM-powered Windows laptops and macOS devices (such as early MacBooks with Apple Silicon) are not compatible.
Check Device Compatibility
Google maintains an official ChromeOS Flex compatibility list. Many older Intel and AMD laptops are supported, but some features, like touchscreens, fingerprint readers, and proprietary drivers, may not work. If your device isn’t listed, you can still try ChromeOS Flex, but hardware compatibility issues may arise. If your laptop meets the requirements, you’re ready to proceed with the installation process.

2. Preparing for Installation
Before installing ChromeOS Flex, gather all the necessary tools and back up your data to prevent accidental loss.
What You’ll Need
- A working computer (Windows, macOS, or Linux) to create the bootable USB drive
- A USB flash drive (8GB or more) to install ChromeOS Flex
- Google Chrome Browser (required for the Chromebook Recovery Utility)
- Internet connection for downloading the operating system
Backup Your Data
Installing ChromeOS Flex will erase all data on your laptop. You can of course, test the OS first. in Live Mode (more on this later) to see if everything works as it should and it fits your requirements. Still it is important to have your files backed up. Follow these backup options:
- External Storage: Use a USB drive or external hard drive.
- Cloud Storage: Upload to Google Drive, OneDrive, or Dropbox.
- Local Backup: Move files to another partition (if dual-booting).
Once you’ve backed up your data and have all the required tools, you’re ready to create a bootable ChromeOS Flex USB drive. Use the following section to create a bootable ChromeOS Flex USB Drive.

3. Creating a Bootable ChromeOS Flex USB Drive
To install ChromeOS Flex, you need to create a bootable USB drive using Google’s Chromebook Recovery Utility. This will allow you to either try ChromeOS Flex in live mode or install it permanently on your laptop.
Step 1: Download the Chromebook Recovery Utility
- Open Google Chrome on a working computer (Windows, macOS, or Linux).
- Go to the Chromebook Recovery Utility on the Chrome Web Store.
- Click “Add to Chrome” and install the extension.
- Open the Chromebook Recovery Utility by clicking the puzzle icon (Extensions) in Chrome.
Step 2: Create the ChromeOS Flex Bootable USB
- Insert an 8GB or larger USB flash drive into your computer.
- In the Chromebook Recovery Utility, click “Get Started”.
- Select “Google ChromeOS Flex” as your model.
- Click “Continue” and select your USB drive.
- Click “Create Now” and wait for the process to complete (this may take 10–15 minutes).
Once the USB is created, remove it safely and use it to boot ChromeOS Flex on your old laptop.
4. Installing ChromeOS Flex on Your Laptop
Now that you have a bootable ChromeOS Flex USB, it’s time to install it on your old laptop.
Step 1: Boot from the USB Drive
- Insert the bootable USB drive into the old laptop.
- Restart the laptop and enter the BIOS/UEFI settings by pressing F2, F12, ESC, or DEL during startup (this varies by manufacturer).
- In the BIOS menu:
- Navigate to Boot Order/Boot Priority and set USB drive as the first boot device.
- Disable Secure Boot if it’s enabled.
- Save changes and exit BIOS.
Your laptop should now boot from the USB drive and load the ChromeOS Flex installer.
Step 2: Try ChromeOS Flex (Live Mode – Optional)
Before installing, you can test ChromeOS Flex without making changes to your system:
- Select “Try it first” from the welcome screen.
- Check if Wi-Fi, keyboard, touchpad, and Bluetooth work correctly.
- Explore the interface and browse the web.
If everything works fine, you can proceed with the full installation.
Step 3: Install ChromeOS Flex Permanently
- Click “Install ChromeOS Flex” from the setup screen.
- Read the warning message: This will erase all data on your laptop.
- Click “Install” and wait for the process to complete (usually takes 5–10 minutes).
- Once done, remove the USB drive and restart the laptop.
After rebooting, ChromeOS Flex will launch, and you’ll be ready for first-time setup.
5. First-Time Setup & Configuration
Once ChromeOS Flex is installed, you’ll need to configure the system and personalize it for daily use.
Step 1: Sign in with a Google Account
- On the welcome screen, connect to Wi-Fi and sign in with your Google account.
- Your Google Drive, Chrome bookmarks, and extensions will sync automatically.
Step 2: Configure System Settings
- Adjust keyboard and touchpad sensitivity in system preferences.
- Enable dark mode or accessibility features if needed.
- Set up automatic updates for security patches.
Step 3: Install Essential Web Apps
Since ChromeOS Flex is web-based, install Progressive Web Apps (PWAs) for better functionality:
- Productivity: Google Docs, Sheets, and Slides
- Entertainment: YouTube, Spotify, Netflix (web apps)
- Communication: Zoom, Microsoft Teams, WhatsApp Web
- File Management: Google Drive, Dropbox
Your laptop is now fully functional with ChromeOS Flex and ready for daily use!
6. ChromeOS Flex Limitations & Workarounds
While ChromeOS Flex is a great way to revive old laptops, it does have some limitations compared to the standard ChromeOS found on Chromebooks. Here are the key drawbacks and how to work around them.
Limitation 1: No Google Play Store (No Android App Support)
One of the biggest differences between ChromeOS Flex and standard ChromeOS is the lack of Android app support. This means you cannot install Android apps from the Google Play Store, which may be a dealbreaker for users who rely on mobile apps.
Workaround: Use web-based alternatives or Progressive Web Apps (PWAs). Many Android apps, such as Google Docs, YouTube, Spotify, and Netflix, have web versions that work just as well on ChromeOS Flex.
Limitation 2: Some Hardware Features May Not Work
Since ChromeOS Flex is designed to run on a wide range of old laptops and desktops, some hardware components may not be fully compatible. Common issues include:
- Touchscreens not responding
- Fingerprint readers not working
- Bluetooth devices not connecting properly
Workaround: Check Google’s compatibility list (here) before installing. If a feature doesn’t work, try using external USB devices (e.g., external Bluetooth adapter or wired keyboard/mouse) or updating firmware in the BIOS/UEFI settings.
Limitation 3: No Virtualisation Support (No Running Windows or macOS Apps Natively)
Unlike some Linux distributions, ChromeOS Flex does not support native virtualisation, meaning you cannot run Windows or macOS applications using software like VirtualBox or VMware.
Workaround: Use cloud-based remote desktop services like:
- Chrome Remote Desktop – To access a Windows or macOS computer remotely.
- Citrix Workspace – For enterprise-level virtualization.
- Cloud PC services like Shadow or Parsec for gaming and productivity.
Limitation 4: Limited Offline Functionality
ChromeOS Flex is designed to work online, which means many of its features require an active internet connection. Some users may find this restrictive, especially if they need to work in environments with limited or no internet access.
Workaround: Enable Offline Mode for key apps:
- Google Docs, Sheets, and Slides – Enable offline mode in Google Drive settings.
- Gmail Offline – Allows reading and composing emails without an Internet connection.
- Media Streaming Services (YouTube, Netflix) – Use browser extensions that allow offline downloads.
Limitation 5: No Support for High-End Gaming
ChromeOS Flex is not built for gaming and does not support Steam or traditional PC games.
Workaround: Try cloud gaming services like:
- NVIDIA GeForce NOW
- Xbox Cloud Gaming
- Google Stadia (discontinued, but alternatives exist)
While casual gaming is possible, ChromeOS Flex is not ideal for serious gamers who need powerful hardware and native gaming support.
ChromeOS Flex is a great solution for lightweight computing, but it does have trade-offs. If you primarily use web-based applications, ChromeOS Flex will feel smooth and responsive. However, if you need Android apps, gaming, or offline software, you may need additional workarounds or consider a different operating system like Linux.
Is ChromeOS Flex Right for You?
Installing ChromeOS Flex is a simple and effective way to revive an aging laptop or desktop, giving it a fast, secure, and lightweight operating system. Whether you’re looking to speed up an old device for basic web browsing, remote work, or student use, ChromeOS Flex provides a smooth and hassle-free experience without the slowdowns that come with older versions of Windows or macOS.
With its easy installation process, built-in Google ecosystem integration, and automatic updates, ChromeOS Flex ensures a low-maintenance, secure, and efficient computing experience. While it has some limitations, such as the lack of Google Play Store support for Android apps and potential hardware compatibility issues, these can often be worked around with web-based alternatives and external accessories.
If you want to extend the life of your old device, reduce electronic waste, and embrace a cloud-focused computing environment, ChromeOS Flex is one of the best free solutions available today. Follow this step-by-step guide, and in just a few minutes, you’ll have a fully functional Chromebook-like experience on your old laptop.