Second Screen for Your Laptop (or a Third): Best Portable Monitors for Students
A second screen or even a third screen change study life tremendously. Notes on one display, research on the other (and another) increased productivity. Fewer tab-juggles, better posture, faster work. This article shows how to pick a portable USB-C monitor that fits student budgets, how to connect it with one cable and which specs actually matter for note-taking, coding, and design.
Quick Picks by Use Case
- Best for lectures & notes (light + affordable): 14″–15.6″ 1080p IPS, matte, ≥300 nits, single USB-C for power + video, under 1.1 kg.
- Best for coding & spreadsheets (more space): 15.6″ 1440p IPS at 120 Hz if available; supports portrait rotation with a fold stand.
- Best for creators (detail & colour): 15.6″–16″ 4K IPS/OLED, 100% sRGB or better, USB-C video plus separate power option for stable brightness.
- Bigger Displays Options: 17.3″, 18.5″, 23.8″ or 24″ bigger but less portable monitors.

Search 24-inch Portable Monitor on Amazon
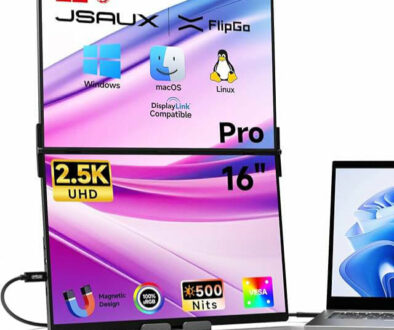
If budget allows, consider a bigger display (17.3″, 18.5″ or 24″) or a combined unit; two displays that deploys vertically or horizontally. These are not only portable, but still works with a single cable from your laptop.

Search Dual Portable Monitor for Laptop on Amazon
Why a portable monitor beats a tablet-as-display
Continuity features are handy, yet a dedicated portable monitor keeps full resolution over USB-C, works with any modern laptop (Mac/Windows/Chromebook), and frees your tablet for other tasks. One cable is all you need when the monitor supports USB-C DisplayPort Alt Mode. It is quicker, more clear cut and less of a hassle to expand your screen.
What to look for (specs that matter)
Size & resolution: 14″–16″ is the sweet spot for bags and library desks with a full HD resolution of 1080p for crisp and efficient space. Higher 1440p resolution gives extra rows and is perfect for gamin while 4K suits photo/video work. Remember to consider also 17.3″, 18.5″ and up to 24″ if you prefer bigger (not necessarily higher resolution) displays.

Brightness & panel: Aim for ≥300 nits and a matte IPS panel for classrooms and coffee shops. If you can stretch your budget, OLED looks gorgeous for creators; use sensible brightness to protect battery life.
Refresh rate: 60 Hz is fine for study. 90–120 Hz helps scrolling and coding comfort. Higher 120Hz or 144Hz refresh rate are good as portable gaming monitor.

Search Portable Gaming Monitor for Laptop on Amazon
Ports: USB-C (DP Alt Mode) for video + power is essential. A second USB-C for pass-through power and mini-HDMI for older kit would be a bonus but not essential depending on your devices.
Power: Bus-powered monitors sip power from your laptop. For long sessions, pick a monitor or dock that accepts PD-in so the wall charger feeds both.
Stand & weight: Integrated kickstand = quickest setup. Folio covers travel well but wobble more. Some model comes with foldable and adjustable stand sometimes known as screen extender. These can be separate stand or integrated, show below are the two (separate or integrated) options.
Colour: For general study, 100% sRGB is perfect. 125% sRGB is becoming increasingly common. Creators can look for wider gamut options.


Search Portable Monitor with Stand for Laptop on Amazon
Step by Step One-cable setup (2 minutes)
- Check your laptop port: Look for the USB-C port with a display symbol or confirm DisplayPort Alt Mode in your laptop manual.
- Plug in the monitor: Use a USB-C to USB-C cable that carries video. If the screen stays dark, try the other USB-C port on the monitor or use the included cable.
- Tidy the layout: Place the portable panel to your non-mousing side for natural head turns. For coding, set it to portrait with a fold stand.
- Tune the image: Set native resolution and adjust scaling (125–150% is comfy at 1440p on 15–16″). Cap brightness around 150–200 nits to stretch battery. Switch on Night Shift/Night Light for late sessions.
If the laptop battery drops during use, power the monitor from the wall (via the dock/monitor’s PD-in) so the laptop charges while driving the display.
Use Cases: Student presets you can copy
Notes & research
- Laptop: Docs/Slides
- Portable screen: PDFs, journals, VLE (Canvas/Google Classroom)
- Why it works: clean split of tasks; easy highlighting without juggling tabs.
Coding & data
- Laptop: terminal, Slack/Teams
- Portable screen (portrait): IDE/editor, wide spreadsheet columns
- Why it works: more vertical lines; faster scanning of logs and diffs.
Design, photo & video
- Laptop: tools + timeline
- Portable screen: full-screen preview, reference mood board
- Why it works: uncluttered canvas; quick checks for colour and framing.
Dock or hub: do you need one?
A basic USB-C hub with pass-through PD keeps power, display, and accessories tidy through a single cable. A USB4/Thunderbolt dock adds headroom for high-bandwidth gear and future dual monitors at your home desk. For pure on-the-go study, a direct USB-C cable from laptop → portable monitor is enough.
Budget Tiers & What You Get
Here are typical features you will find from the different budget tiers of portable monitors.
Budget: 14″–15.6″ 1080p IPS, bus-powered, simple folio stand. Great for lectures and tight budgets.
Midrange: brighter screens (300–350 nits), sturdier kickstands, dual USB-C, mini-HDMI.
Upper Midrange: 1440p panels, 120 Hz options, better speakers, colour modes. Display size is also bigger at 16″ or 17.3″ or 18.5″
High-End: 4K IPS/OLED, factory calibration, metal builds, strong stands. Higher refresh rate, bigger displays up to 24″
Prioritise panel quality, brightness, and stand over small CPU/refresh differences. Comfort pays for itself during revision.
Battery & comfort tips
As the screen draws power from your laptop, some tweaks to the settings will help prolong your battery life. You can drop its refresh rate to 60 Hz for reading marathons, use portrait for code and long articles to reduce eye travel and set a warm colour temperature after sunset. Alternatively, if you have to be untethered while working remotely, consider a power bank to charge your laptop. For comfort, keep the top of the portable screen close to eye line; prop with a textbook if needed.
Troubleshooting in a pinch
When it comes to troubleshooting a new unit, consider the following: Black screen: the cable may be charge-only. Swap for a video-rated USB-C cable. Charging but no display: move the cable to the monitor’s video-capable USB-C port. Fuzzy text: switch to the monitor’s native resolution and adjust OS scaling. Mac + two externals later: many Macs need a dual-port or DisplayLink dock for multi-monitor; plan ahead if you want that at home.
Portable monitor vs full desktop monitor
A portable panel wins for mobility and quick setups. A 24–27″ desk monitor wins for comfort during long essays. Many students carry the portable screen to class and park a bigger USB-C monitor in their room for deep work.
Commonly Asked Questions
We finish with some frequently asked questions:
Do I need Thunderbolt for a portable monitor? No. USB-C with DisplayPort Alt Mode is enough for one portable screen and charging.
Can the portable monitor charge my laptop? Some can when they have PD pass-through. If yours is bus-powered only, it draws from the laptop instead.
1080p or 1440p for 15.6″? 1080p saves power and looks sharp. 1440p gives more rows for code and spreadsheets with 125–150% scaling.
2.5K, 3K and 4K ups and down? The higher the resolution, the more dots on the display that your laptop needs to push, increasing demand on the device but it does mean way sharper images, perfect for creators and designers.
Is OLED worth it for students? For creators, yes. Colour and contrast look excellent. For general study, a bright matte IPS is great and usually cheaper.
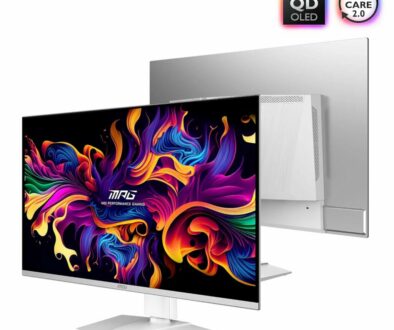
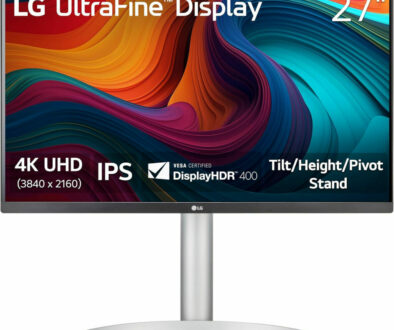
Here are your OLED and higher resolution options.


