Portable Monitor and Dock: The Perfect One-Cable Multi-Display Setup for Your Laptop
A tidy desk makes study days feel lighter. A single USB-C cable can charge your laptop, light up a second screen, connect your keyboard/mouse, and add fast storage and Ethernet. This guide shows you exactly how to build that one-cable setup with a portable monitor + USB-C/Thunderbolt dock—from parts list to plug-in order, with presets for note-taking, coding, and design.
Often you find that as a student, you already have a laptop and do not need a full size desktop. This makes it easier to pack away and move as well as to work away from your desk or dorm. BUT, this means you compromise on a full desktop experience. Usually buying a normal monitor and leaving this in the dorm will do the trick. You just have to connect to your laptop when you get back, but with the lack of ports on modern laptops, an external monitor without an onboard hub does reduce connectivity on your laptop. Here’s is a one-stop solution or one-cable solution which is also portable by the way, which makes it perfect, again for packing away or taking with you over your term breaks.

At-a-glance parts list (pick one from each line)
Here is what you need:
-
Portable monitor (14–16″): USB-C with DisplayPort Alt Mode; 1080p for notes/coding, 1440p/4K for creators; ≥300 nits; matte preferred for classrooms. Small enough to pack away.
-
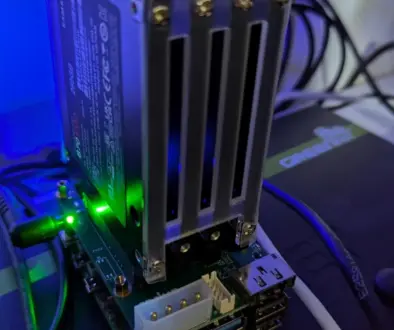
Dock: USB-C (USB4/Thunderbolt-class if possible) with power delivery (PD), one display output, 2× USB-A, SD if you shoot photos, optional Ethernet. Again, choose a compact model, so you can pack and take this with you if needed. You can of course leave this in the dorm or accommodation and just take your portable monitor with you if you do not need all the extra ports.
-
Charger: 65–100 W USB-C GaN (small and travel-friendly). This usually comes with your laptop but if yours is a chunky block, consider a compact alternative for portability sake.
-
Cables: earmarked USB-C to USB-C (100 W), plus a spare. Optional USB-C ↔ DP/HDMI if your monitor needs it. This is your one cable to rule them all.
-
Stand/sleeve: fold-flat magnetic stand or a sleeve that doubles as a stand.

Step-by-step setup (15 minutes)
Check your laptop’s display & power support
-
Confirm your USB-C port supports DisplayPort Alt Mode and Power Delivery (PD).
-
If you plan dual external monitors later, check your model’s maximum external display support. macOS handles multi-display differently from Windows—some Macs need a dual-port dock or a DisplayLink dock for two screens.
1) Place and power the dock
-
Put the dock where the cable can reach your laptop comfortably (left or right of the keyboard).
-
Plug the 65–100 W charger into the dock’s PD-in port so the dock can power everything.
2) Connect the portable monitor to the dock
-
Use USB-C → USB-C first (best for power + video + data).
-
If your monitor only has HDMI for video, use the dock’s HDMI/DP port and a separate USB-C cable for power to the monitor (if needed).
3) Run one cable from dock → laptop
-
That single cable should now: charge your laptop, feed video to the portable monitor, and connect any USB accessories on the dock.
4) Tune the display
-
Set scale (e.g., 125–150% at 1440p on 14–16″), enable Night Shift/Night Light, and cap brightness around 150–200 nits to stretch battery.
-
For coding, consider portrait mode with a fold-flat stand. For design, enable sRGB mode if your monitor offers it.
5) Pair inputs and tidy cables
-
Pair your Bluetooth mouse/keyboard, or plug them into the dock.
-
Coil excess cable with a reusable tie; keep the desk edge clear for notebooks.

How to use your extra real estate (portable monitor): Three proven use-cases
As you will see, it all comes down to the size and resolution of your portable monitor. The other hardware stays pretty much the same unless you need fast USB4 Thunderbolt connectivity.
A) Note-taking & lectures (light, battery-first)
Monitor: 14″ 1080p matte, bus-powered over USB-C.
Dock: mini USB-C hub with PD pass-through.
Flow: wall charger → hub (PD-in) → one cable to laptop; hub’s 2nd USB-C goes to the portable monitor.
Why: smallest weight; slides into a backpack; fast to set up in libraries.
B) Coding & spreadsheets (space + comfort)
Monitor: 15.6″ 1080p/1440p, supports portrait.
Dock: USB4/Thunderbolt-class with Ethernet and 2× USB-A.
Flow: charger → dock; dock → laptop (one cable); dock → monitor via USB-C or DP.
Why: stable network for package installs; tall lines of code without squinting.
C) Design/photo/video (colour + bandwidth)
Monitor: 15.6″ 4K IPS/OLED (calibrate if colour-critical).
Dock: Thunderbolt/USB4 with SD reader and at least 85–100 W PD.
Flow: charger → dock; dock → laptop; dock → 4K monitor (USB-C or DP).
Why: more pixels for timelines and palettes; fast card import; safer power headroom.

Your Shopping Guide – How to Choose
Portable monitor:
Size: 14–16″; Resolution: 1080p for study, 1440p/4K for creators.
Brightness: ≥300 nits; Panel: IPS (matte) or OLED (glossy, richer colour).
Ports: USB-C video; bonus if it has PD-in and acts as a tiny hub.
Stand: integrated kickstand beats folio covers for stability.
Dock:
USB4/Thunderbolt-class if you want maximum display bandwidth and upgrade room.
PD-in of 85–100 W for larger laptops; 65 W is fine for most thin-and-lights.
Ports to aim for: 1× video (HDMI/DP), 2× USB-A, 1× USB-C data, SD reader, Ethernet.
Cables & power:
Use e-marked 100 W USB-C cables; label one as your “desk cable” and keep a spare in your sleeve.
A compact GaN charger keeps the kit light; check your laptop’s recommended wattage.
Do You Need Thunderbolt 5 vs USB4 vs USB-C?
For most use case, USB-C would suffice however consider the following based on your requirements
-
USB-C (DP Alt Mode + PD) is enough for one portable monitor and charging.
-
USB4/Thunderbolt-class docks give you more display bandwidth, better hub performance, and cleaner upgrades (e.g., dual external screens at home).
-
If you plan dual 4K later, choose a USB4/Thunderbolt-class dock now.
How to Budget for Power and Ensure that One Cable Brings Enough Charge
Finally with everything set up and ready to go keep the monitor brightness modest; bus-powered screens sip power from the laptop as long as you do not jack up the brightness. If the laptop slowly loses charge, step up to a higher-watt charger or power the monitor from the dock instead of the laptop. Using high refresh rate (120 Hz) and external drives increase power draw, fine at a desk but less ideal on battery.
Recommended next reads on Colour My Tech