How to Transform Your Old Router into a Wi-Fi Range Extender
If you have an old router gathering dust, don’t throw it away just yet. You can repurpose it as a Wi-Fi range extender to boost your wireless network’s coverage without spending extra money. This article will show you how to configure your old router to extend your existing Wi-Fi network in five easy steps.
Over the years, from changing broadband providers, I have accumulated a small collection of broadband routers. On top of that, for better coverage and keeping up with the WiFi standards to better support new devices especially with WiFi 6 (and with new devices now featuring WiFi 6E and 7), I have bought powerful routers of my own. This leaves me with routers that are just sat round. What better way to use them to say extend WiFi to the garden office or out house?
Why Use an Old Router as a Wi-Fi Extender?
Using an old router as a Wi-Fi extender comes with several advantages. First, it saves money since you don’t need to invest in a separate Wi-Fi extender. Additionally, it helps improve coverage by extending the Wi-Fi signal to areas with weak or no connectivity. Repurposing an old router also reduces e-waste, making it an eco-friendly solution. On top of that, setting up an old router as an extender is relatively easy, requiring only a few configuration steps to give new life to your device.

Step-by-Step Guide to Setting Up Your Old Router as an Extender
We break down the process into five simple steps below. Note that this will require you to search the documentations and specifications of your router online to ensure that they are compatible and have the correct settings to support this transformation..
Step 1: Check Router Compatibility
Before setting up your old router as an extender, ensure it supports Wireless Repeater Mode, Access Point Mode, or Bridge Mode. If your router lacks these modes, third-party firmware like DD-WRT or OpenWrt might be an option. Note that the latter will get a lot more technical so we won’t blame you if you back out. However, you have got nothing to lose since your old routers are redundant anyways.
Step 2: Reset the Old Router
To start fresh, perform a factory reset:
- Power on the router.
- Locate the reset button (usually at the back).
- Press and hold it for about 10-30 seconds until the router reboots.
Step 3: Connect to the Old Router
- Plug the old router into power.
- Use an Ethernet cable to connect your PC to one of the router’s LAN ports.
- Open a web browser and type the router’s default IP address (often 192.168.1.1 or 192.168.0.1).
- Log in using the default credentials (usually found on a label on the router).

Step 4: Configure as a Wi-Fi Extender
Here, if your router supports one of the following modes; Wireless Repeater, Access Point or Bridge then jump to the options below accordingly:
Option 1: Using Wireless Repeater Mode (If Supported)
- Navigate to Wireless Settings.
- Look for Repeater Mode or Range Extender Mode.
- Select your main Wi-Fi network and enter the password.
- Save settings and reboot.
Option 2: Using Access Point Mode (Wired Connection)
- Disable DHCP in the network settings.
- Set a static IP address that doesn’t conflict with the main router (e.g., 192.168.1.2).
- Connect the old router to the main router via an Ethernet cable from a LAN port on the main router to a LAN port on the old router.
- Configure the Wi-Fi SSID and password to match your main network (or set a different name if preferred).
- Save settings and reboot.
Option 3: Using Bridge Mode (Wireless Bridge)
- Navigate to Network Settings on the router’s configuration page.
- Look for Bridge Mode or Client Mode.
- Enter the SSID and password of your main Wi-Fi network.
- Set a unique IP address that does not conflict with the main router (e.g., 192.168.1.3).
- Disable DHCP to ensure the main router handles IP assignments.
- Save settings and reboot.

Step 5: Optimise the Setup
To ensure optimal performance, place the old router in a location where it can receive a strong signal from the main router while still extending coverage effectively.
Adjusting the Wi-Fi channel is also important; setting the extended network to a different channel than the main router helps minimize interference and improves stability.
Finally, test the signal strength in different areas using apps like NetSpot or Wi-Fi Analyzer. This will allow you to fine-tune the placement and settings to maximize your Wi-Fi coverage.
Conclusion
Repurposing your old router as a Wi-Fi range extender is a cost-effective way to eliminate dead zones in your home. With a few simple steps, you can boost your Wi-Fi signal and make better use of your outdated hardware.
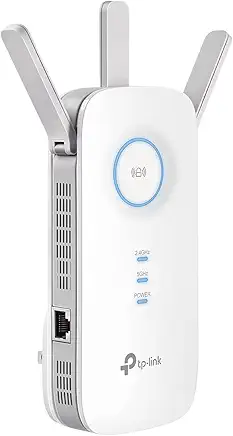
Try it today and enjoy seamless connectivity throughout your home! If none of the settings are obvious to you on your old router, then consider a WiFi Range Extender (Amazon).